{{making our house a home}}

Thursday, March 25, 2010

2 Weeks? Seriously?

Agh! It has been exactly two weeks since I last posted. I'm so so sorry. Hehe.

We have been so busy around here. The girl started dance {what a cutie patootie!} and the boy started soccer {which I am coaching...eek!}. Last weekend, I tagged along with Hubby to a disc golf tournie. After the game, he was tossing a mini disc around with a buddy, fell and tore a ligament in his ankle. No more excuses! I have started many-a blogs in the past. Life would get in the way and I gave up. So, I am coming back this time. Thank you to everyone that called me on it.

What got me back today is the $5 Challenge at Living with Lindsay. She issued a challenge to her readers to create a spring decoration spending no more than $5 at a dollar store. Before posting I took a sneak peak at a few of the other entries. Wow! These ladies are great!

I was inspired by this little birdie and my new found obsession with making cake plates.


First, I spray painted my little friend with Heirloom White. After that he got a "glaze" bath with some brown paint I had laying around mixed with a little water.

I found this vase on one of the aisles at the 99 Cent Store and I fell in love with the color. So pretty! I immediately went looking for a white plate. I did not want a cream plate competing with my little friend.

Glue glue glue, paint paint paint, camera ate some pictures, blah blah blah...and here is my very simple, very cute Spring decoration. **This is a inside, night picture...I will be replacing it in the morning when I have good light**


Breakdown:
Birdie - .99
Plate- .99
Vase - .99
Bag of Moss - .99 {used less than a third}
Bag of Eggs - .99 {used halfish}
Paint & Glue - on hand

There we are...under $5 and we have a new Spring worthy decoration.
I just hope the kids leave the eggs alone. There is no candy in them, kids!

Now, go check out the other beautiful decorations.

Thursday, March 11, 2010

Chalkboard Recipe Board

The internet is used a lot around here for recipes, despite all the cookbooks stuffed in the cabinet. The bad part about this is that I waste a lot of paper jotting down recipes so I have them in the kitchen {I am too messy to take my laptop near any kitchen appliance}. I saw crafties using chalboards as menus and I decided to try it as a Recipe Board.

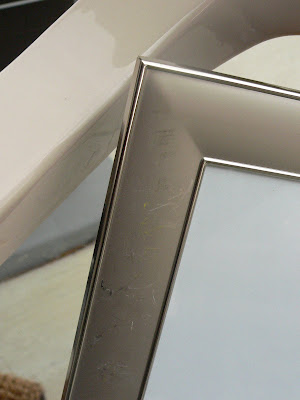
This is what I started with.


This was really thrifty because the frame was in a garage sale box, the black paint has been used for a couple other projects and the chalkboard paint was given to us by my father-in-law for the kiddies playroom {there's still enough for that project!}. The frame was super duper scratched up.
I scratched it up a bit more, sprayed the frame black and the glass chalkboard.


Let it dry, put it back together and voila!


I can take it to the computer with me, write does the recipe and put it up near my prep area. I can also write down recipes from books that I don't want to ruin, like my new retro cookbook from yesterday {that's where this St Patty's Day inspired recipe is from}.


I love it and I can not wait to use it! Unfort, tonight we are having hot dogs and tater tots...no recipe there!

- Laney

I am linking to:
100 Ideas Under $100 at Beyond the Picket Fence
Strut Your Stuff Thursday @ somewhat simple {giveaway!!}
Get Your Craft On Thursday @ Life as Lori
Transformation Thursday @ The Shabby Chic Cottage
Show Your Stuff Party @ Fireflies & Jellybeans
Frugal Friday @ The Shabby Nest
Feature Yourself Friday @ Fingerprints on the Fridge
Frugalicious Friday @ Finding Fabulous
Make sure you stop by and comment on these fabulous projects!!

Wednesday, March 10, 2010

Isn't She Lovely, Isn't She Wonderful

Wordless Wednesday
kinda

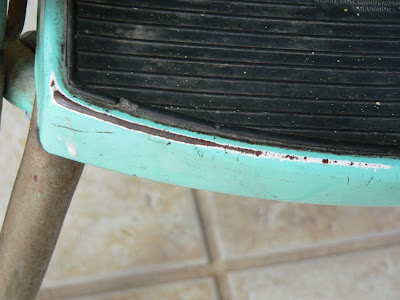
These were my thrift store finds yesterday. Love my new {old} chair and retro cookbooks. Yay!


And...since I already used a few words...while your sitting there, check out the giveaway at It's the Little Things sponsored by Dimples & Dandelions {awesome baby & kids store}.

- Laney


Monday, March 8, 2010

Mommy Made It Monday - Crafter's Apron


I, for one, think this is the cutest thing I have ever made! I searched and searched the internet for the perfect Crafter's Apron pattern. I liked a little bit of a lot of them. At 10pm Saturday night, I decided to just jump in and create my own from what I had learned {reason for no tutorial or pics}. After a few mistakes, some only perceived, a ton of ironing & planning, and a lot of love I created something that I love! I am definitely going to have to wear something other than sweats while using this. It deserves at least that much respect. Hehe.

The entire apron is lined, as well as each pocket. The top pockets are all larger and there are 4 pencil/pen/brush pockets on the bottom. The sash is made out of the same material as the back lining. I think the eyelet ruffles makes the whole thing. And, yes, I know I can't sew a straight line to save my life. Literally, if someone had a gun to my head and said, "sew a straight line, punk" I would die. I'm ok with it, though.

You do need to help me with a decision, though. I wanted to attach something that I can attach pins to as I take them out of fabric or hold them before I put them in. So, to bird or not to bird? That is the question.


Let me know what you think!

Linking up to some fabulous blog parties!
Just Something I Whipped Up
@ The Girl Creative
Making the World Cute Monday @ Making the World Cuter
DIY Project Parade @ The DIY Showoff
Make Your Monday
@ Twice Remembered
Made It Monday @ The Persimmon Perch
Motivate Me Monday @ Keeping It Simple
Made By You Monday @ Skip to my Lou
I know it's a lot, but at least pick a couple and go through the links. They are so fun & cute!

Sunday, March 7, 2010

The Little Mommy Who Could

Happy Sunday!

I was sitting here thinking about all of the projects I have left for March and I realized...there is so much to do!

I figured I would post a list of all the projects that we need to finish this month {I'm sure I will think of more along the way...sorry, Hubby}.

Downstairs Bathroom
Finish painting trim
Find frame for Hawaiian picture & hang
Put shells in jar
Put soaps in jar
Clean up paint mess
Add ruffle to shower curtain
Frame mirror
Make starfish art & hang
Buy one colored towel to match room
Place basket with TP under cabinet

Kid Space
Paint walls!
Decide on doors or curtain for closet
Paint closet doors with chalkboard {if we decide on them}
Build bookcases
Set up VCR {yes, you read that right - I have a bunch of VHS tapes for them to watch}
Paint & attach desk
Frame board games (a la infarrantly creative}
Have kids make art
Print & frame kids' pics
Curtains??
Organize!!!

There are a few other odds 'n' ends things for the Kid Space. I'm just not super duper sure on them, yet.

Figuring I really want to get these things done by the 19th{uh...12 days!}, I need to get busy, busy, busy! Like, complete 2 tasks per day busy. I think I can! I think I can! The Little Mommy Who Could. Ok, sorry.

Tomorrow, I will finish the painting, clean up the paint mess and decide on the closet doors. Plus, I have something so stinkin cute for Mommy Made Monday. I can't even believe that I/me/myself made it! Actually, I better go finish it.

- Laney

Friday, March 5, 2010

Blog Giveaways!!

There are a few giveaways on some of my favorite blogs and I thought I would pass the info along!!

Thomas Paul Tree Tote from Made by Stephie.

Vintage Hankie Apron from Ruffles and Stuff.

Dwell Studio products from The Busy Budgeting Mama.

Good luck!!

If you have a giveaway going on, let me know and I will add it to my list.

Thursday, March 4, 2010

DIY Apothecary

If you follow the DIY blog world, you have seen a million of these. If you don't, then this is totally my original idea {wink!}.

I started with this gaudy gold candle holder I found at the Salvation Army and knew I could help her.. This picture does not do it enough injustice. I also started to work again before I remembered the pictures. Ugh!!

I used Krylon Black Satin {real exciting, huh?}. It took two coats and now she is beauty-ful! {Pics are bad...overly cloudy this afternoon}

Here she is in all her glory. I also got this jar at the SA. I will glue it to the base, I just didn't know if I would like the way it looked, so I decided to live with it for a little while. I have decided I love it and will glue it tomorrow. That's my living room in the background, but I will be putting this in my downstairs bathroom.

FYI: The candlestick and jar were a total of $2.35!

Tomorrow is half off day at the Salvation Army {yay!}, so we will be headed over there after dropping my son off at school.

Get your craft on Thurs.
giveaways
The Shabby Chic Cottage


Beyond The Picket Fence